Published: March 2020 | Last Updated:December 2025
© Copyright 2026, Reddog Consulting Group.

To succeed on Amazon, your product listings need to do two things exceptionally well: appeal to Amazon's A9 algorithm and persuade real people to buy. This isn't about stuffing keywords into every available space. It's a methodical process of ensuring every element—from the title to the last image—works together to drive visibility, traffic, and ultimately, measurable sales growth.
Before you start tweaking titles or rewriting bullet points, you need a clear strategy. A high-converting listing is never an accident; it’s the result of a solid foundation built on understanding how Amazon works.
Think of your listing as your digital storefront and primary salesperson. You have just seconds to capture a shopper's attention, deliver the information they need, and build enough trust to earn the sale.
At the heart of it all is Amazon's A9 algorithm, a sophisticated system designed to show customers the products they are most likely to buy. It primarily weighs two types of factors:
These two sides are completely intertwined. A perfectly keyword-optimized listing that doesn't convert will eventually drop in the rankings. Conversely, a best-selling product with poor keyword targeting is leaving significant revenue on the table by missing out on qualified search traffic.
To build a listing that satisfies both the algorithm and your customers, we follow a proven, three-stage framework: Foundation → Optimization → Amplification. This approach creates a powerful growth loop where every action is strategic, measurable, and builds on the last.
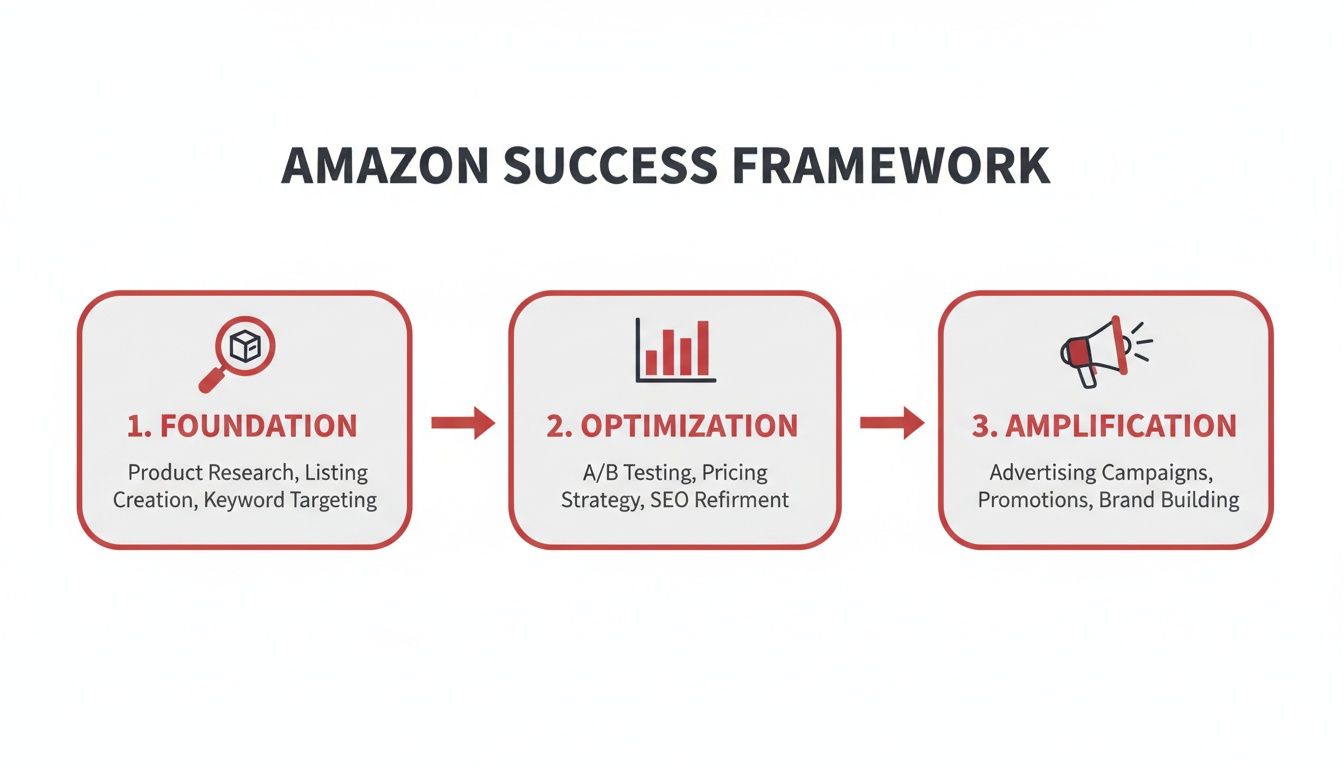
As you can see, solid research (Foundation) informs your on-page changes (Optimization), which then gives your marketing and advertising efforts (Amplification) the power to drive real, sustainable growth.
The data supports this approach. A recent study revealed that nearly 80% of Amazon sellers consider keyword optimization their top strategy for driving sales. With over 2.7 billion monthly visits to the platform, a data-driven strategy is essential to stand out.
This process starts with getting the basics right, like ensuring your product identifiers are correct. If you're new to selling, reviewing your guide to Amazon product identifiers can help you avoid common and costly setup errors.
For brands looking to expand their reach, the Amazon Associates program offers another powerful revenue channel. By starting with a strong foundation, you set your brand up not just for a quick win, but for long-term, omnichannel growth.
Let's be clear: effective keyword research is the engine of Amazon SEO. This isn’t about guessing what customers search for; it’s about using data to find the exact phrases they use. This is the first and most critical step in the Optimization phase of our growth framework.
A listing built on the wrong keywords is like a retail store with no sign on the door. It doesn’t matter how great your product is if no one can find it.
Your goal is to satisfy two audiences simultaneously: the A9 algorithm and your target customer. The algorithm needs clear keyword signals to understand what your product is and when to show it. Your customer needs to see familiar, compelling language that solves their problem and builds immediate confidence in your solution.
A robust keyword strategy isn't about finding one "magic" keyword. It's about building a comprehensive portfolio of terms to attract shoppers at every stage of their buying journey.
Here’s a practical breakdown of what you need:
Specialized tools are essential for this work. Platforms like Helium 10 provide invaluable data on search volume, competitor strategies, and keyword relevance, giving you a massive analytical advantage.

Combining third-party tool data with insights from Amazon's own Brand Analytics gives you a powerful, data-backed view of what your customers are really searching for.
Once you have your keyword list, the next step is strategic placement. The goal is to integrate these terms naturally, creating copy that persuades a human while being perfectly structured for Amazon's algorithm.
Think of your listing's text fields as different levels of a funnel. Your title grabs the broadest audience with primary terms, while your bullet points and description use secondary and long-tail keywords to answer specific questions and drive the conversion.
Here’s where to place keywords for maximum impact:
By placing the right keywords in the right places, you ensure your product gets discovered without sacrificing the clear, compelling copy needed to convert that click into a sale.
Once a shopper lands on your page, your images and copy become your 24/7 salesperson. In an online environment where customers can't physically interact with your product, these elements must do all the heavy lifting to build trust, answer questions, and drive a purchase decision.
This is where your optimization strategy becomes tangible. Effective visuals tell a story that stops a customer from scrolling. Persuasive copy does more than list features; it translates them into tangible benefits that solve a real problem for your customer.
Your image block should function as a cohesive visual presentation. Each image serves a specific purpose, guiding the customer from initial interest to a confident purchase. A complete visual set answers questions instantly and forges an emotional connection that text alone cannot achieve.
Based on our experience, every high-converting listing includes a core set of seven essential image types. Consider these non-negotiable for maximizing engagement and turning browsers into buyers.
| Image Type | Purpose and Best Practice |
|---|---|
| Hero Image | Your main product shot on a pure white background. It must be crisp, clear, and professional to meet Amazon's requirements and make a strong first impression. |
| Lifestyle Photos | Show the product in use. For a kitchen gadget, show it creating a delicious meal. This helps customers visualize the product in their own lives, connecting it to a desired outcome. |
| Infographics | Use text overlays and graphics to highlight key benefits, dimensions, or technical specs. This makes complex information easy to digest at a glance. |
| Feature Callouts | Zoom in on specific details—like stitching, materials, or a unique button—and use short text to explain their value. This demonstrates quality and attention to detail. |
| Comparison Chart | Compare your product to other models in your own lineup. This simplifies the decision-making process, prevents customers from navigating to competitor pages, and creates up-sell opportunities. |
| "What's in the Box" Image | Clearly display everything the customer will receive. This manages expectations, reduces returns, and answers a common question proactively. |
| Brand Story/Promise Image | Use one image to briefly communicate your brand's mission or guarantee (e.g., "Family-Owned," "Satisfaction Guaranteed"). This builds trust and humanizes your brand. |
Investing in high-quality visuals is a strategic move that directly impacts your bottom line. When we overhauled a struggling fitness mat listing with a full suite of professional images—lifestyle shots, infographics, and close-ups—the result was a 156% increase in conversion rate and a jump from page 3 to page 1 in just 60 days.
Once your visuals capture attention, your copy must close the deal. The language should be clear, persuasive, and focused entirely on the customer's needs. Avoid jargon and technical specs; instead, explain what's in it for them.
Your product features tell the customer what your product is. Your benefits tell them why they should care. Always lead with the "why."
For example, instead of saying, "Made with 18/8 Stainless Steel," reframe it as a benefit: "Built with Rust-Proof 18/8 Stainless Steel to keep your drinks tasting pure for years—no metallic aftertaste, ever." This small shift connects a technical detail to a direct customer advantage.
Here's where to focus your efforts:
To streamline the process, you can explore AI content creation tools for video, text, and images. These tools can help generate polished copy and visual concepts efficiently, allowing you to focus on overall strategy.

While your title and bullet points attract shoppers, your A+ Content is what convinces them to stay. For brand-registered sellers, this feature is your opportunity to transform a standard product page into an immersive brand experience.
Think of it as your dedicated digital showroom. Here, you can use high-quality images, comparison charts, and compelling text to overcome objections, answer questions proactively, and build the trust that fosters brand loyalty.
Standard product descriptions are limited. A+ Content allows you to guide the customer's journey with a mix of visual and text modules, showcasing your brand’s personality and key differentiators in a way that truly connects with shoppers.
Effectively using this space is a critical part of the Optimization phase of our growth framework. The data is clear: a well-designed A+ layout can directly and measurably improve your conversion rate.
Amazon’s own data suggests that listings with A+ Content can see a 3-10% increase in conversion rates and a 5-8% increase in traffic. As detailed in this analysis of listing optimization strategies, this lift occurs because rich media helps answer questions and reduce purchase friction.
Building effective A+ Content isn't about decoration; it's about strategic communication. Each module should have a clear purpose, working together to build a narrative that moves shoppers toward the "Add to Cart" button.
Your A+ Content should function like your best salesperson. It must proactively answer the top three customer questions, show the product in action, and clearly differentiate it from the competition.
Here are several high-impact modules we consistently leverage for our clients:
Your A+ Content is the perfect canvas for reinforcing your brand's visual identity across channels. Ensure the fonts, colors, and imagery align with your website and other marketing materials. This consistency is key to building brand recognition and credibility.
For a deeper dive into maintaining a cohesive brand presence, read our guide on adhering to Amazon Brand Guidelines.
By treating A+ Content as a critical strategic asset rather than an afterthought, you can elevate the customer experience, drive higher conversion rates, and build a brand that customers remember and trust.
An optimized listing is only half the battle. Once you've nailed your keywords, images, and A+ Content, the final piece of the puzzle is social proof. On Amazon, nothing speaks louder than customer reviews—they're one of the most powerful signals of trust for both shoppers and the A9 algorithm.
Without a steady flow of genuine feedback, even the most polished product page will have a hard time getting off the ground. A solid review strategy isn't just a "nice to have"; it's a core part of optimization that directly fuels your sales velocity and, in turn, your search rank.
You can't just cross your fingers and hope for reviews. To build real momentum, you need a proactive—and compliant—system for asking customers to share their thoughts. Lucky for us, Amazon gives us a few tools to do this the right way.
While the 'Request a Review' button is solid, a slightly more personal touch can go a long way, as long as you follow Amazon's policies to the letter. Using a third-party tool to create a simple, automated email sequence can gently nudge buyers without being pushy.
The trick is to frame your emails around customer service, not begging for a five-star rating. A simple two-email sequence usually does the job: one to confirm delivery and offer help, and a second a week later politely asking for their feedback on the product.
Seriously, Don't Break This Rule: Never, ever offer incentives, discounts, or freebies for a positive review. This is a fast track to getting your account suspended and a direct violation of Amazon's Terms of Service. Your goal is to encourage honest feedback, not to buy a better rating.
Getting reviews is just step one. Managing them is where you build brand loyalty and get priceless feedback on your product. Every single review, good or bad, is a chance to connect with your customers and prove you're listening.
Responding to Positive Reviews
A quick "Thank you!" can make a huge difference. When someone leaves a glowing review, acknowledging it shows you appreciate their business and makes their positive experience even better. It’s a small gesture that can turn a happy customer into a loyal one.
Handling Negative Reviews
A bad review feels like a punch to the gut, but your response is what really matters.
By actively managing your reputation, you not only soften the blow from bad reviews but also show a commitment to quality that no amount of keyword stuffing can replicate. This builds a foundation of trust that’s essential for long-term growth.

Once you begin to optimize Amazon product listings, practical questions arise quickly. It's one thing to understand the theory, but implementing it effectively is where the real work begins.
Here, we'll walk through some of the most common questions we hear from brands to provide clarity and confidence as you move forward.
This is the most common question, and the honest answer is: it depends. Results are not instantaneous. The A9 algorithm needs time to re-index your changes and measure how shoppers respond.
However, you can look for key indicators along a general timeline:
Patience is crucial. Monitor your metrics, but avoid making reactive changes every few days. Give the algorithm and your customers time to respond.
Yes, absolutely. While continuous improvement is the goal, constantly overhauling your listing can do more harm than good by confusing the algorithm and resetting any ranking momentum you've built.
Think of your listing's rank like a snowball gaining mass as it rolls downhill. Radical changes to your title or core bullet points stop that momentum and force the A9 algorithm to re-evaluate your product from scratch, which can stall growth or cause your rank to drop.
A more effective approach is to batch strategic updates every 30-60 days. Conduct your research, implement a focused set of changes, and let the data accumulate for at least a month. Then, analyze the results to inform your next strategic move. Smaller tweaks to backend keywords or A+ Content are less disruptive and can be done more frequently.
Keyword prioritization is a balance of art and science. The goal is to find the sweet spot between high search volume, direct relevance, and manageable competition.
Here is a simple framework for prioritization:
By structuring your keywords this way, you provide the algorithm with the data it needs while creating a clear, compelling listing for your human customers. Nailing this balance builds the foundation for a listing that doesn't just get found—it converts.
Ready to move from questions to measurable results? The team at RedDog Group has spent two decades turning listings into revenue drivers. We build the foundation, optimize for conversion, and amplify your brand for sustainable omnichannel growth. Let's talk about what's next for your brand. Let’s Talk Growth.
Leave a comment: